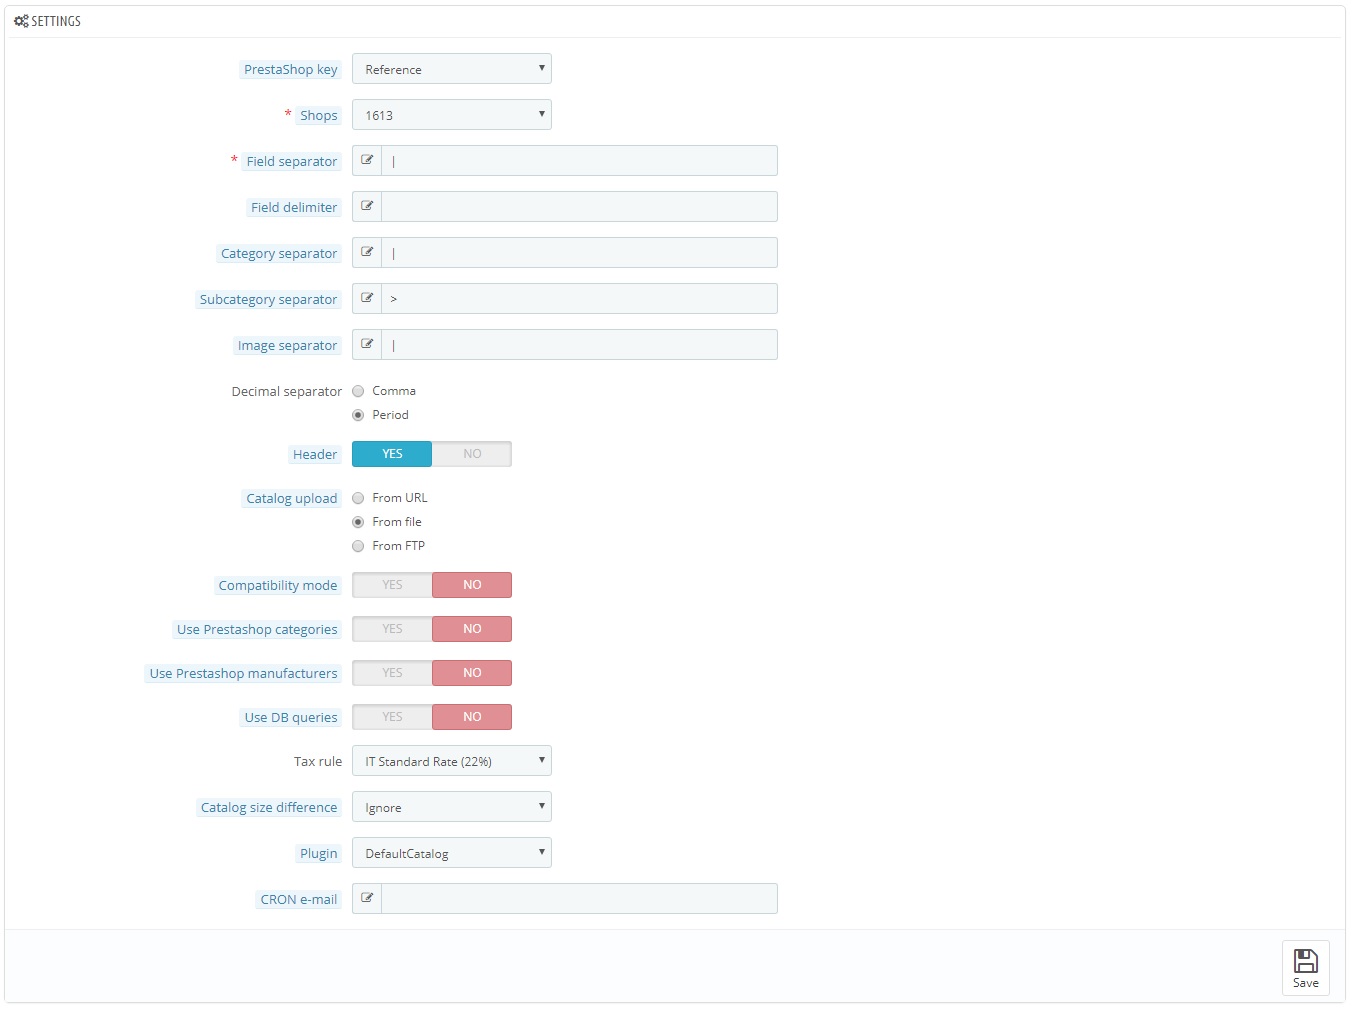
The SETTINGS panel allows to save the required parameters for a proper catalog interpretation. It is necessary to pay the maximum attention to the values inserted in this page: an erroneous configuration can lead to inconsistent imports, both for categories and products.
In this area it is possible to configure the following fields.
- Prestashop key: the primary key that identifies every single product in the catalog will be imported in Prestashop using the field selected here.
- Shops: select the shop where the catalog will be imported.
- Field separator: the character used to delimit each column of the catalog. For instance:
| for a catalog like field_1|field_2|field_3
– for a catalog like field_1 – field_2 – field_3
- Field delimiter: the character that is used at the beginning and at the end of the field, if present. For instance:
“ for a catalog like “field _1”|” field _2”|” field _3”
‘ for a catalog like ‘field_1’|‘ field _2’|‘ field _3’
- Category separator: if the catalog puts all the categories together in a single column, fill in the character used to delimit each group. Leave blank if you are certain that each column only has one category tree. For instance:
> for a catalog like category, subcategory, subcategory > category, subcategory, subcategory
- Subcategory separator: if the catalog has the whole category tree in a single column, fill in the character used to subdivide the different categories in the tree. For instance:
, for a catalog like category,subcategory,subcategory> category,subcategory,subcategory
- Image separator: fill in the character used to subdivide the different images for the product. For instance:
, for a catalog like site.com/img1.jpg,site.com/img2.jpg,site.com/img3.jpg
- Decimal separator: choose between period or comma depending on how prices are written in your catalog.
- Header: choose Yes if the first catalog row is used as header, No otherwise.
- Catalog upload: choose the method you intend to use to upload the catalog. Depending on the selection made, the Import CSV panel will adapt itself.
- Compatibility mode: if turned on, the module will try to automatically correct the most common errors that can be found in a catalog. In detail:
- fields longer than a certain number of characters will be cut at the maximum allowed length to prevent errors;
- html tags will be removed from the description.
If turned off, those fields will be imported as they are, skipping the product whenever they should violate Prestashop’s specifications.
- Use Prestashop categories: select Yes if you plan to import catalog categories to map them with Prestashop’s, select No if you plan to use categories from the catalog.
- Use Prestashop manufacturers: select Yes if you plan to import catalog manufacturers to map them with Prestashop’s, select No if you plan to use manufacturers from the catalog.
- Use DB queries: the module will perform database queries to update prices and quantities, avoiding to execute Prestashop hooks that might slow down the import process. This mode will work only if Update price/qty or Update price/qty/reference is selected in Import tab.
- Tax rule: choose the tax that will be applied to each product during the import process.
- Catalog size difference: select how big the difference from the previous catalog can be (10%, 20%, 30%), so to prevent the import process from running and import a potentially erroneous catalog. Select Ignore if you want to always import the new catalog.
The Overwrite option has to be used while uploading a catalog with errors: in detail, it is advisable to use it when you notice that one or more products have the same unique identifier within the same catalog. After manually editing the catalog and fixing the duplicated product by removing it or by adding the correct identifier, it will be possible to upload it again so to guarantee the diff to keep working properly during the import process.
- Plugin: this menu allows to select the proper file which checks for catalog validity. By default the module is offered with only one file that handles the most common import settings. Depending on the different catalogs the user might work with, it is possible to create custom plugins: contact us for more informations.
- CRON e-mail: insert one e-mail address the CRON report will be sent to. If left blank, the CRON will try to send an e-mail to the one used for the shop.
Import CSV

The IMPORT CSV panel completes the General Tab: depending on the chosen Upload method a different mask will appear.
- From URL: copy the remote file download link into the text area, then click on Download file. The module is optimized to download from Dropbox too. Head over to dropbox.com, click on the Share button next to the file you’re interested in, then select Copy link. Paste it in the text area within the module.
- From file: click on Browse file, then click on Upload file to upload it. Pay attention to the Max upload file size: bigger files won’t be uploaded.
- From FTP: fill in the required data in the different text fields. Each field expects to receive only the part highlighted in bold. Leave Port blank, if not present.
NOTA BENE: no data is sent outside the module. The module saves internally only Host, file URL and Port for a better usability. Neither Name nor Password are saved or used outside of the code strictly needed to contact the FTP server.
