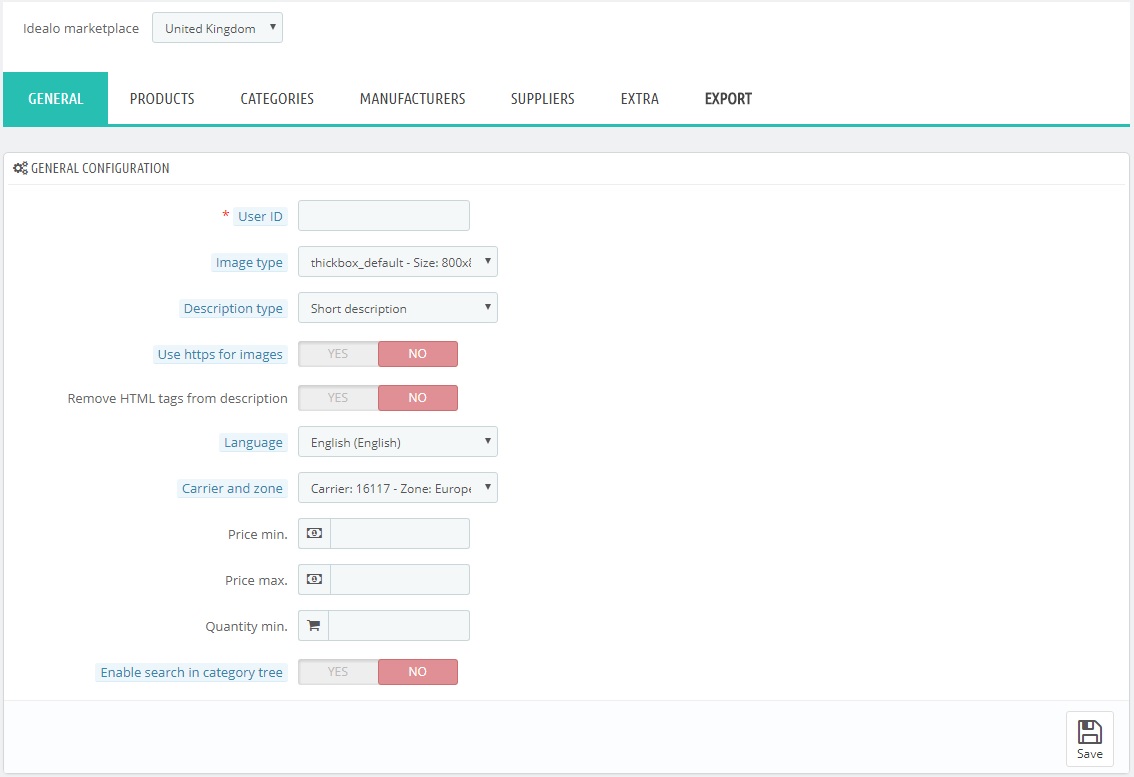
The Export to Idealo module is subdivided in tabs and it’s important to configure and check them all in order to publish offers in the Marketplace.
The desired marketplace can be selected using the menu at the top of the page. Each marketplace will have its own configuration, which can be saved by clicking the button at the bottom right.
The first TAB is called GENERAL because it offers the general configurations to setup data export:
- User ID, your own user ID on the marketplace. This information will generate a code that will be added to the file export link: that code will always be the same for your ID, so that it won’t be necessary to change the link in case the module has to be reinstalled.
- Image type, this selection will let you choose which image format to send for the product to be created on the marketplace based on the ones available on your Prestashop.
- Description type, this selection will let you choose whether to send the short or the long description as the product description for the new product to be created on the marketplace.
- Use https for images, if enabled, images will be sent with https protocol in their link instead of http.
- Remove HTML tags from descriptions, if description presents HTML tags it is possible to remove them using this option.
- Language, product data will be exported using the selected language.
- Carrier, relevant data for shipping will be taken using the selected carrier and zone.
- Price min., during the synchronization process the module won’t send products with price lower than the one set.
- Price max, during the synchronization process the module won’t send products with price higher than the one set.
- Quantity max., during the synchronization process the module won’t send products with quantity lower than the one set.
- Enable search in category tree, this option enables a text area in the Category tab, so to easily look for the desired category to enable or disable. WARNING: it might slow down the module a lot in case many categories are present.
Once the configuration is complete, clicking on “Save” the module will update all the data.
