CATALOG MARKUP PANEL
The Catalog markup option allows to define a markup that will be applied to all the products in the catalog, both as fixed value or percentage, at the next import. This markup will be applied to the product sale price; if the catalog only has a wholesale price, the markup will be calculated taking that one as reference. In order to update all the products with a new markup, it is mandatory to click on Delete catalog backups (see Import Tab for more information). The module lets you set different markups for price ranges: the Min product value has to be considered included, the Max product value has to be considered excluded. Markups are applied in the following order: Fixed value first, Percentage value then (this markup will be summed up to the sale price plus the fixed value).
It is also possible to add an additional Price markup for each category: that value (fixed or percentage) will be added to the sale price with the Catalog markup already applied.
Click on the Save button before re-loading the module or changing page, so to save all the markups added until now. In order for a markup to be saved, it is mandatory to first load categories using the dedicated button, then refresh the page with the respective button.
CATEGORY MAPPING PANEL

The tab remains locked until a catalog is uploaded.
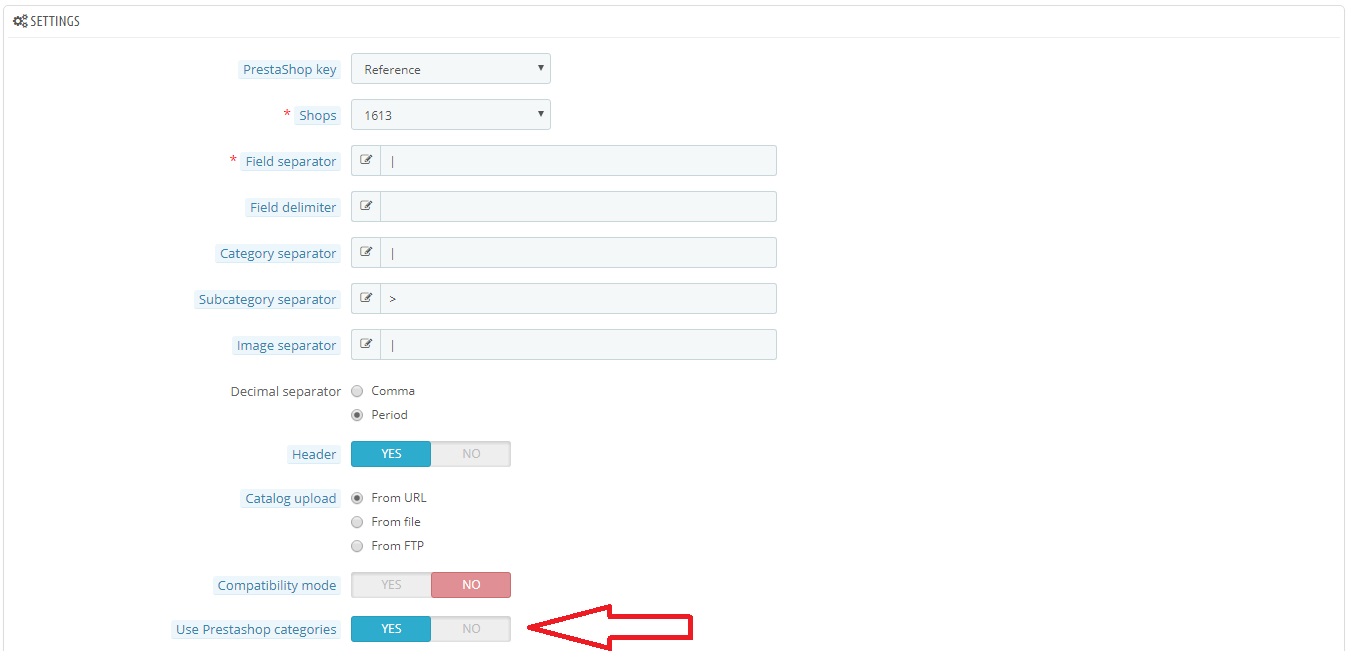
The fields available in this tab depend on the setting chosen for Use Prestashop categories in the General tab.
Use Prestashop categories -> Yes

Choosing Yes in Use Prestashop categories, the MAPPING panel will show four dropdown menu where to choose the desired Prestashop category. Start with the left most menu, then go on with the following ones.
The Load CSV categories button will read the catalog and populate the module with all the categories found, setting them as active by default. Clicking on it, two spinning arrows will appear: wait for the module to complete the file elaboration, it might take a while. Then, update the category list by pressing on the Update category list button.
The categories will be generated like “Category 1 > Category 2 > Category 3”, so to map Prestashop category to the whole path available in the CSV.
If you opt for using Prestashop categories, the mapping process is mandatory: if this operation is not performed, all the products will be skipped during the import process.
It will now be possible to select the desired category in the Universal Import panel, then select the Prestashop one from the four dropdown menus and click on Save mapping to link them. To remove an association, it is enough to leave all the four menus on Don’t map, then click on the desired category and click again on the Save mapping button.
Use Prestashop categories -> No
Choosing No in Use Prestashop categories, the MAPPING panel will not show the dropdown menus with shop categories.
The Load CSV categories button will read the catalog and populate the module with all the categories found, setting them as active by default. Clicking on it, two spinning arrows will appear: wait for the module to complete the file elaboration, it might take a while. Then, update the category list by pressing on the Update category list button.
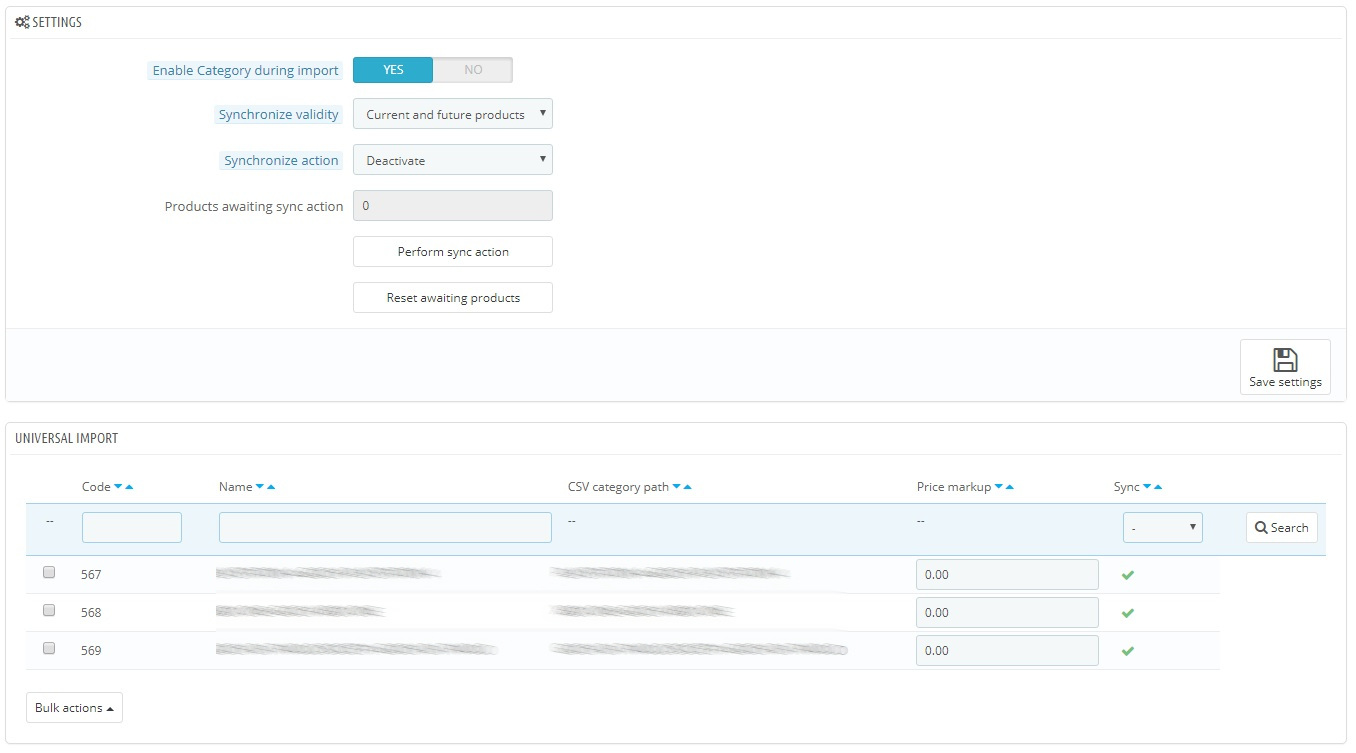
Each single category will appear under the Name column, while the CSV path will appear under the CSV category path column.
Loading categories is not mandatory in case you opted for using the ones from the catalog, but it highly advisable: it speeds up the import process itself, it offers the possibility to apply categories markup, it offers the possibility to disable categories for which we don’t want to import products and it also allows to easily spot mapping errors. If at first you thought the catalog would contain only one column with a single category tree, but you then notice unexpected names (Cosmetics%%Perfumes, Cars>>Motorbikes etc.), you can correct the mapping and launch a new category import.
If you chose Use categories No, the tab will show you another panel called SETTINGS with the Enable category during import option, which is especially useful when an updated catalog is uploaded.
Enable category: YES
When it is set to YES and the user didn’t previously click on Load CSV categories, when a new category is found during the import process, that category will be created and the product will be imported.
Enable category: NO
On the contrary, the category will appear in the modules database as disabled.
When you need to apply a markup, leave Enable category on No, then manually enable the category, set the markup and save it. Then, launch the import process again.
The panel also feature two more settings to handle manufacturer synchronization.
Synchronize validity offers two choices: setting Future products, the module will keep working in the standard way, explained before; setting Future and current products and saving, new options will become available.
The Synchronize Action will be performed every time the green mark is clicked in the Synchronize column. The module will try to deactivate, set to zero or delete all the products related to that category. Should the server execution time not be long enough, the number of remaining products will be reported next to Products awaiting sync action: click on Perform sync action to complete all the missing products. Wait for the on screen confirmation to be sure that the operation ended properly (please note: depending on your server performance and on the number of products, this operation might take a while to complete).

