Shipping settings
In this tab it is possible to decide how to handle shipping times configurations for those products that will be synchronized to your own account on the Marketplace.
The Marketplace already has a predefined shipping time system for your account.
Default shipping delay: default shipping time (number of days required to prepare the product for shipment) used when not specified for categories, manufacturers or suppliers;
Get shipping delay from: choose the configuration type in regards to the shipping times that will be applied during the synchronization process.
At the end of the operation, click on “Save” to update the data.
Template settings
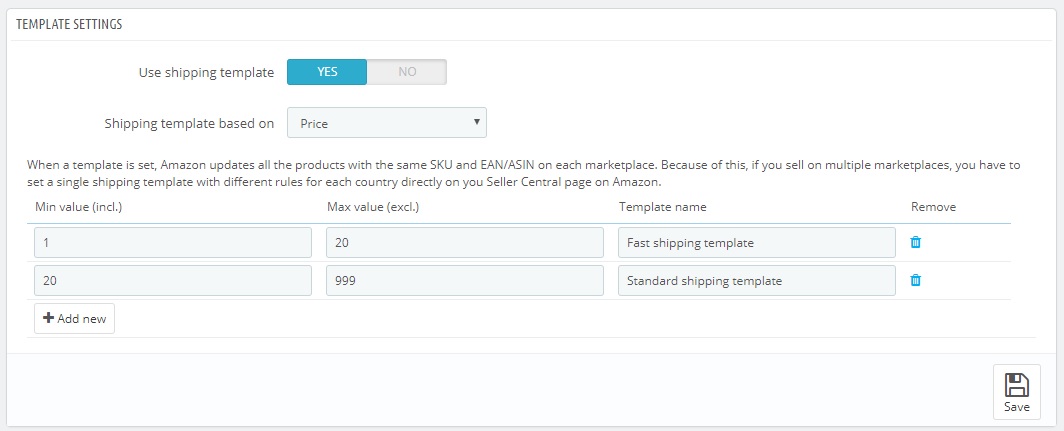
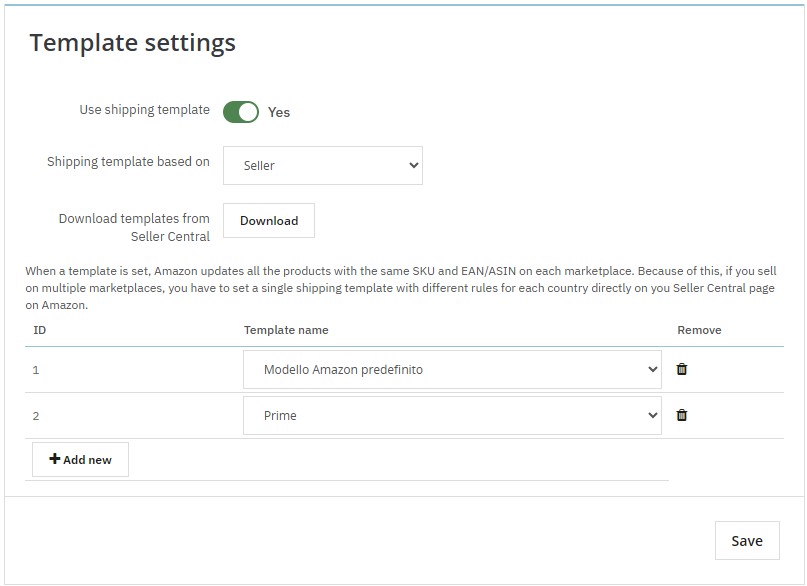
If you use the shipping templates on Amazon, it is possible to configure them enabling the Use shipping template option. A dedicated menu will appear where you will be able to select whether the template should be applied to products based on Price or Weight. Set the respective value in the Shipping template based on menu.
Download templates from Seller Central: use this button to download shipping templates currently used on your Seller Central account. You will then be able to associate them to the different ranges you created or to the specific elements. Make sure to use this option every time you perform a change on Seller Central.
WARNING: once a template is set, Amazon will update all the products with the same SKU and EAN/ASIN on each marketplace. Because of this, if you sell on more marketplaces, set only one template with different rules for each country directly on the Amazon’s Seller Central.
Template based on: PRICE/WEIGHT
In this mode you can configure your templates creating dedicated ranges. When exporting offers, the template will be associated to the respective product or to its combinations depending on its price or weight.
Make sure to fill in a minimum which is equal to the maximum added in the previous line, so to avoid having uncovered ranges.
For example:
Right
MIN: 0 – MAX: 20
MIN: 20 – MAX: 999
Wrong (no template would be associated from 20,01 to 20,99)
MIN: 0 – MAX: 20
MIN: 21 – MAX: 999
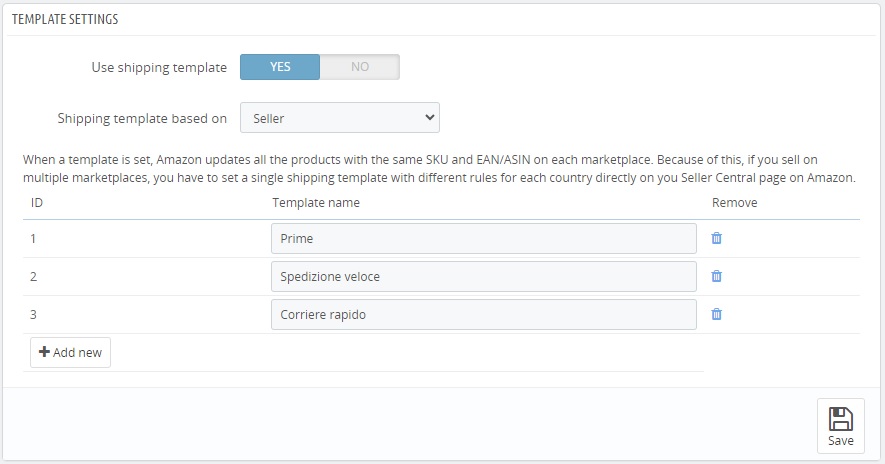
Template based on: SELLER
Once you added all the desired templates, click on Save to confirm your selection and unlock new modules’ functionalities. Wait for the page to refresh before of going on.
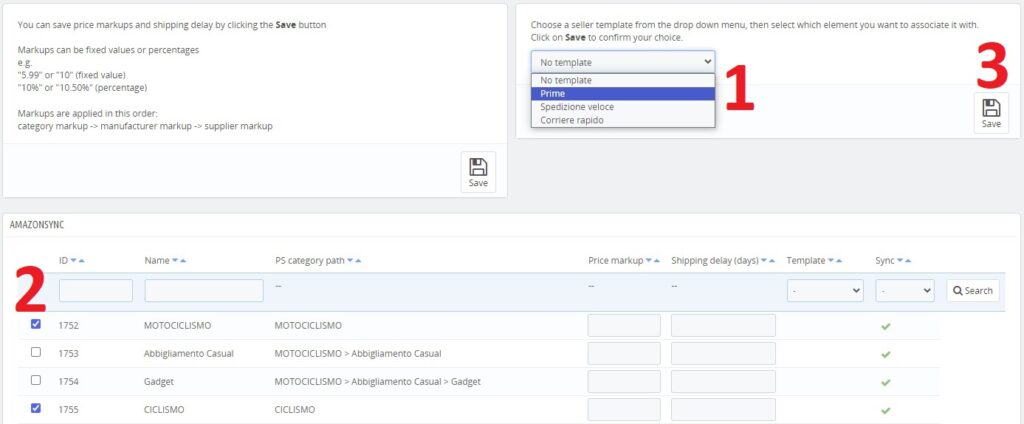
Within the Categories tab you will find a new panel with a dedicated menu for templates inside of it. First of all, select the template you would like to use, then check the different categories.
In the end, click on Save: the selected template will appear within the Template column.
All the products that have for default category (the one with the blue dot within Prestashop) the selected ones will be associated to that template.
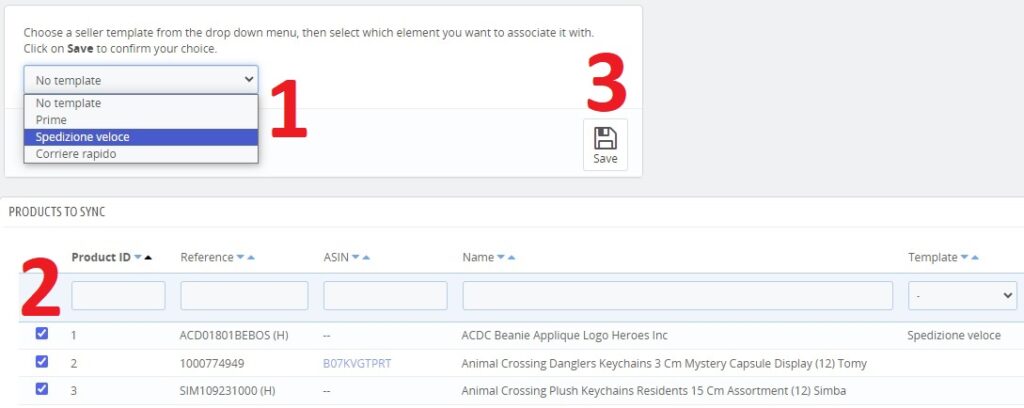
If you need to associate specific templates to certain products, use the module’s Products tab. Just like for categories, select a template from the menu insed of the new panel that is now available, then select the products you want to associated it with, finally click on Save. The new template will appear under the Template column.
If the product has combinations, each of them will receive the template selected inside the menu. This selection has a higher priority compared to the category’s: if you associate a specific template to a product, then the module will use this one, even if the default category has a different one.
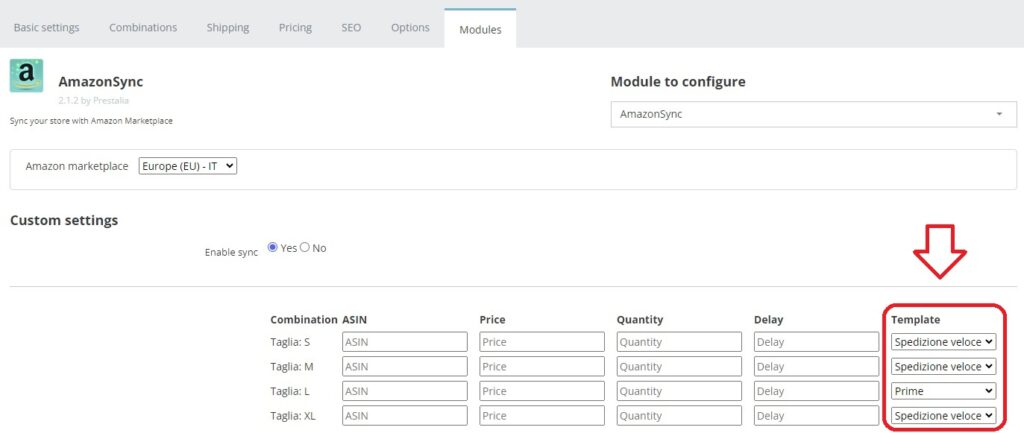
If you need to change the shipping template for a specific combination, this can be done by opening the Prestashop product and clicking on the Modules -> Amazonsync tab.
Within this panel there will be a new Template menu where you can select one of the values you filled in within the module, combination per combination. This column is visible only if the template mode is set to Seller.
